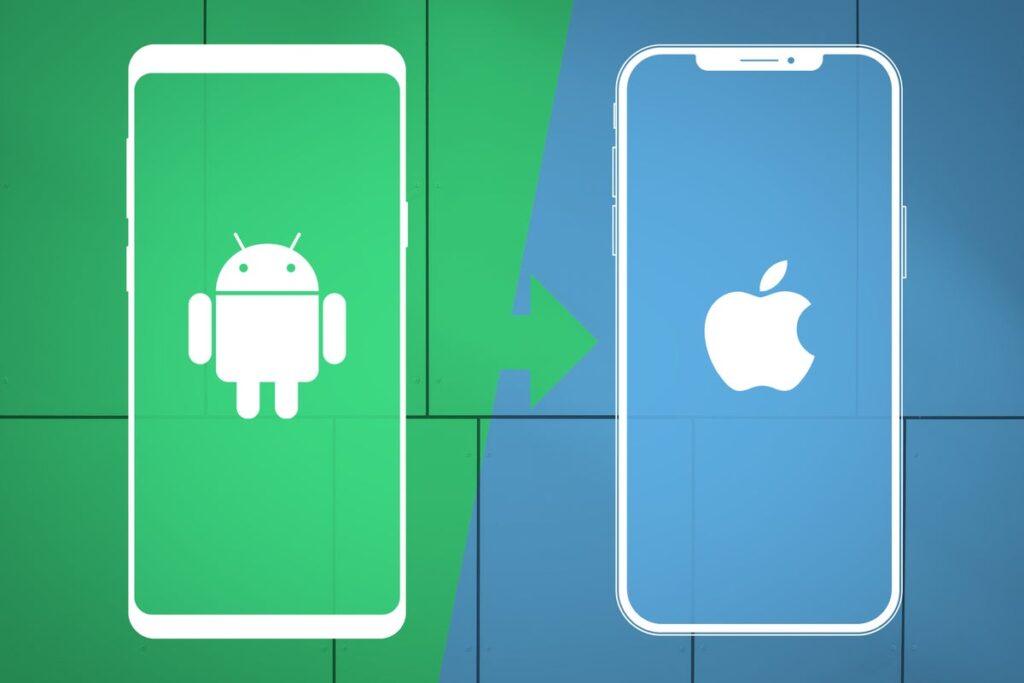
So you’ve given in to peer pressure and made the decision to switch from Android to iPhone, but you’re not quite sure where to begin. Don’t worry, we’ve got you covered! In this beginner’s guide, we’ll provide you with the essential dos and don’ts when making the transition, as well as tips on how to easily transfer all your Android content to your new iPhone. Whether it’s contacts, photos, or apps, we’ll help ensure a smooth and seamless switch to iOS. So buckle up and get ready to embark on your new iPhone journey!
Preparing to Switch

Backing up Your Android Device
Before switching from Android to iPhone, it is important to back up all the data on your Android device to ensure a smooth transition. There are several methods you can use to back up your Android device:
- Google Account: Make sure your Android device is connected to your Google Account. This will automatically back up your contacts, calendars, and app data.
- Android Backup Service: Go to your Android device’s settings and look for the “Backup & Reset” or “Backup & Restore” option. Enable the backup service and select the data you want to back up.
- Third-Party Backup Apps: There are several third-party apps available on the Google Play Store that specifically cater to backing up Android devices. Research and choose a reliable app that suits your needs.
By backing up your Android device, you can easily transfer all your important data to your new iPhone.
Checking Compatibility
Before making the switch, it is vital to ensure that your Android apps and data are compatible with iOS. While many popular apps are available on both platforms, some apps may not have iOS versions or may have different functionalities.
Visit the Apple App Store and search for the apps you currently use on your Android device. Read the app descriptions and reviews to determine if they have similar features and ratings. If you rely heavily on specific apps that are not available on iOS, you may need to explore alternative options or find similar apps that can fulfill your needs.
Additionally, check if any of your accessories, such as smartwatches or fitness trackers, are compatible with iOS. Compatibility issues can have an impact on your overall user experience when switching to iPhone.
Gathering Necessary Information
Before making the switch, gather all the necessary information that you will need during and after the transition. Here are a few key pieces of information to collect:
- Contact List: Make sure you have a complete list of all the contacts stored on your Android device. You can either export them to a file or sync them with your Google Account for easy access.
- Photos and Videos: Backup all your precious memories stored in your Android device’s gallery. You can use cloud storage services like Google Photos or manually transfer them to a computer.
- Apps and App Data: Take note of the apps you regularly use and any important data associated with them. This will help you decide which apps you need to reinstall or find alternatives for on your new iPhone.
By gathering this information beforehand, you can ensure a smooth transition and minimize any potential disruptions to your daily routine.
Security Considerations
Setting Up a Strong Passcode
One of the first things you should do after switching to your new iPhone is to set up a strong passcode. This will help protect your device from unauthorized access and keep your personal information secure.
To set up a strong passcode on your iPhone, follow these steps:
- Go to the “Settings” app on your iPhone.
- Scroll down and tap on “Face ID & Passcode” or “Touch ID & Passcode”, depending on the authentication method your iPhone supports.
- Enter your current passcode, if prompted.
- Tap on “Change Passcode” or “Turn Passcode On” if you haven’t already set up a passcode.
- Follow the on-screen prompts to set up a new passcode. Make sure to choose a strong alphanumeric passcode that is not easily guessable.
By setting up a strong passcode, you can ensure that your personal data remains secure even if your iPhone is lost or stolen.

Enabling Two-Factor Authentication
Two-factor authentication (2FA) adds an extra layer of security to your iPhone by requiring both your password and a verification code to log in to your Apple ID. Enabling 2FA is highly recommended to protect your personal information and prevent unauthorized access.
To enable Two-factor authentication on your iPhone, follow these steps:
- Go to the “Settings” app on your iPhone.
- Scroll down and tap on your name or Apple ID at the top of the menu.
- Tap on “Password & Security”.
- Tap on “Two-Factor Authentication” and follow the on-screen instructions to set it up.
Once 2FA is enabled, you will need to verify your identity using a trusted device or phone number whenever you sign in to your Apple ID on a new device or make changes to your account.
By setting up 2FA, you can add an extra layer of protection to your iPhone and safeguard your personal information from unauthorized access.
Transferring Data
Using the ‘Move to iOS’ App
To easily transfer your Android data to your new iPhone, Apple provides a dedicated app called “Move to iOS”. This app allows you to wirelessly transfer various types of data, including contacts, messages, photos, videos, bookmarks, email accounts, and calendars.
To use the “Move to iOS” app, follow these steps:
- Set up your new iPhone until you reach the “Apps & Data” screen.
- Tap on “Move Data from Android” and then tap on “Continue”.
- On your Android device, download and install the “Move to iOS” app from the Google Play Store.
- Open the “Move to iOS” app on your Android device and tap on “Continue” to agree to the terms and conditions.
- On your new iPhone, tap on “Continue” and wait for a code to appear.
- Enter the code displayed on your iPhone into the “Move to iOS” app on your Android device.
- Select the types of data you want to transfer and tap on “Next”. The transfer process will begin. Make sure to keep both devices nearby and connected to Wi-Fi.
- Once the transfer is complete, follow the on-screen prompts to finish setting up your iPhone.
Using the “Move to iOS” app, you can effortlessly transfer your essential data from your Android device to your new iPhone without the need for cables or complicated procedures.
Transferring Contacts, Photos, and Videos
Contacts, photos, and videos are typically the most important data stored on our smartphones. When switching from Android to iPhone, you can easily transfer these types of data using various methods.
- Using Google Account: If your contacts are synced with your Google Account, simply sign in to the same Google Account on your iPhone. Your contacts will automatically sync to your iPhone’s Contacts app.
- Using ‘Move to iOS’ App: As mentioned earlier, the ‘Move to iOS’ app can transfer contacts, photos, and videos from your Android device to your new iPhone. When using the app, make sure to select these data types for transfer.
- Manually Transferring Photos and Videos: If you prefer to manually transfer your photos and videos, you can connect your Android device to a computer via USB and copy the files to your computer. Then, connect your iPhone to the computer and transfer the files using iTunes or the Finder app.
By using these methods, you can ensure that your important contacts, photos, and videos are successfully transferred from your Android device to your new iPhone.
Transferring Apps and App Data
When switching from Android to iPhone, you will need to find iOS versions of the apps you regularly use. While many popular apps are available on both platforms, some apps may not have iOS counterparts or may have different functionalities.
To transfer your app data from Android to iOS, follow these steps:
- Make a list of the apps you currently use on your Android device.
- Visit the Apple App Store on your iPhone and search for each app.
- If an app is available on iOS, download and install it on your iPhone.
- For apps that require signing in or syncing with an account, sign in with the same account you used on your Android device. This will allow your app data to sync to your new iPhone.
- For apps that do not have iOS versions, search for alternative apps on the App Store that offer similar features. This way, you can continue to enjoy similar functionality on your iPhone.
By taking the time to find iOS versions of your favorite apps and syncing your app data, you can seamlessly transition from Android to iPhone without losing important information or features.

Transferring Music and Documents
When it comes to transferring your music and documents from Android to iPhone, there are a few different methods you can use:
- Music: If your music is stored in a cloud-based service like Google Play Music or Spotify, simply install the respective app on your iPhone and sign in with the same account. Your music will be available for streaming or offline listening. If you have music files stored on your Android device, you can manually transfer them to your computer and then sync them to your iPhone using iTunes or the Finder app.
- Documents: For documents like PDFs, Word files, or Excel sheets, you can use cloud storage services like Google Drive, Dropbox, or iCloud. Upload your documents to the cloud storage service of your choice and then access them on your iPhone by installing the respective app or using the built-in Files app.
By leveraging cloud storage services and syncing your music and documents, you can easily access your favorite songs and important files on your new iPhone.
Getting Familiar with iPhone
Understanding the Home Button
Unlike Android devices, iPhones have a physical home button that serves as a central navigation tool. The home button allows you to perform various actions and quickly access different features on your iPhone.
Here are some common actions you can perform using the home button:
Single Press:
- Bring your device out of sleep mode
- Dismiss notifications
- Access Siri (for older iPhones with Touch ID)
Double Press:
- Access the app switcher for multitasking
- Control audio playback
Long Press:
- Activate Siri
- Access Apple Pay (supported devices)
For newer iPhone models without a physical home button, such as the iPhone X or later, the home button functionalities are replaced by gestures. These gestures will be discussed in more detail in the “Learning the Gestures” section.
Understanding the various actions you can perform with the home button will help you navigate your iPhone more efficiently.
Learning the Gestures
If you have a newer iPhone model without a physical home button, such as the iPhone X or later, you will need to learn the gestures that replace the functionalities of the home button. Familiarizing yourself with these gestures is essential for smooth navigation on your iPhone.
Here are some common gestures used on iPhones without a home button:
Swipe Up from the Bottom:
- Return to the home screen from any app
- Access the app switcher by pausing halfway through the swipe
Swipe Down from the Top-right Corner (iPhone X or later):
- Access the Control Center
Swipe Down from the Top-left Corner (iPhone X or later):
- Access the Notification Center
Swipe Left or Right at the Bottom:
- Quickly switch between recently used apps
These are the primary gestures used for navigation on iPhones without a home button. As you begin using your new iPhone, practicing these gestures will help you navigate the device more intuitively.
Navigating the Home Screen
The home screen is where you can find all your apps and easily access various features on your iPhone. Understanding how to navigate and customize the home screen will enhance your overall user experience.
Here are some key elements and actions related to the home screen:
- App Icons: The home screen is filled with app icons. Tap on an icon to open the corresponding app.
- App Library (iOS 14 and later): Swipe left on the home screen to access the App Library, which automatically categorizes your apps for easier navigation.
- Dock: The dock is located at the bottom of the home screen and provides quick access to your most frequently used apps. By default, it can hold up to four apps, but you can customize it to include more apps.
- App Switcher (with home button): Double press the home button to access the app switcher. This allows you to quickly switch between recently used apps. Swipe left or right to navigate through the app previews, and tap on a preview to open the corresponding app.
- App Switcher (without home button): Swipe up from the bottom and pause to access the app switcher. Follow the same actions as mentioned above to navigate through the app previews and open apps.
By familiarizing yourself with the layout and functionalities of the home screen, you can efficiently navigate your iPhone and access your favorite apps and features.
Customizing Your iPhone

Personalizing the Wallpaper and Theme
Personalizing your iPhone’s wallpaper and theme is a great way to make it feel more like your own. By choosing a wallpaper that resonates with your style and selecting a theme that suits your preferences, you can customize your iPhone’s appearance.
To personalize the wallpaper and theme on your iPhone, follow these steps:
- Go to the “Settings” app on your iPhone.
- Scroll down and tap on “Wallpaper” or “Display & Brightness”, depending on your iOS version.
- Tap on “Choose a New Wallpaper” or “Wallpaper” to browse through the available options.
- Select a wallpaper from the provided categories or choose a photo from your camera roll.
- Adjust the positioning and zoom level of the wallpaper, if desired.
- Tap on “Set” or “Set Home Screen” to apply the wallpaper to your iPhone’s home screen. You can also choose to set it as the lock screen or both.
Additionally, you can customize the theme of your iPhone by selecting a suitable appearance option, such as light mode or dark mode, depending on your preference. This can be done in the “Settings” app under the “Display & Brightness” section.
By personalizing the wallpaper and theme, you can add your own touch to your iPhone and make it reflect your unique style.
Setting Up Widgets
Widgets are interactive elements that provide quick access to information or actions right on your iPhone’s home screen. They can display weather updates, calendar events, news headlines, and much more, allowing you to stay informed and efficient.
To set up widgets on your iPhone, follow these steps:
- Long-press on an empty space on your home screen until the apps start jiggling.
- Tap on the “+” icon at the top-left corner of the screen.
- Browse through the available widgets or use the search bar to find specific ones.
- Select a widget and choose the size you prefer (small, medium, or large).
- Tap on “Add Widget” to place it on your home screen.
- Drag and drop the widget to your desired location.
- You can also stack multiple widgets together by dragging one widget on top of another. This allows you to swipe through them for easy access.
By setting up widgets on your iPhone, you can customize your home screen with useful information and shortcuts that suit your needs.
Organizing Apps in Folders
As you install more apps on your iPhone, it is essential to keep your home screen organized and clutter-free. One way to achieve this is by organizing your apps into folders based on categories or usage.
To create folders and organize apps on your iPhone, follow these steps:
- Long-press on an app icon until all the icons start jiggling.
- Drag an app icon onto another app icon to create a folder.
- Enter a name for the folder or choose a suggested name based on the app category.
- Tap outside the folder to exit the edit mode.
- To add more apps to the folder, drag and drop them onto the folder icon.
- You can also rearrange the apps within the folder by long-pressing and dragging them.
By organizing your apps into folders, you can easily locate and access them without cluttering your home screen.
Exploring iOS Features
Using Face ID or Touch ID
Face ID and Touch ID are convenient and secure authentication methods available on certain iPhone models. They allow you to unlock your iPhone, make secure purchases, and access various apps and features using your face or fingerprint.
To set up Face ID or Touch ID on your iPhone, follow these steps:
- Go to the “Settings” app on your iPhone.
- Scroll down and tap on “Face ID & Passcode” or “Touch ID & Passcode”, depending on your iPhone model.
- Enter your current passcode, if prompted.
- Follow the on-screen instructions to set up Face ID or Touch ID. This typically involves scanning your face or fingerprint.
Once Face ID or Touch ID is set up, you can use it to unlock your iPhone, authorize app installations, make Apple Pay transactions, and more. It provides an added layer of security and convenience to your iPhone experience.

Getting Started with Siri
Siri is Apple’s voice-activated virtual assistant that can help you perform various tasks, answer questions, and provide recommendations on your iPhone. To get started with Siri, follow these steps:
- Activate Siri by pressing and holding the side button on your iPhone or by saying “Hey Siri” if you have enabled the voice-activated feature.
- Ask Siri a question or give a command. For example, you can ask Siri for the weather forecast, set a reminder, send a message, or play a song.
- Siri will respond to your query or carry out the requested action.
Siri can assist you in many ways, such as sending messages, making calls, setting reminders, providing directions, and even controlling smart home devices. By utilizing Siri’s capabilities, you can streamline your daily tasks and access information more efficiently.
Managing Notifications
Notifications on your iPhone provide updates and alerts from various apps and services. Managing notifications allows you to customize how and when you receive these alerts, ensuring that they don’t overwhelm you and disrupt your workflow.
To manage notifications on your iPhone, follow these steps:
- Go to the “Settings” app on your iPhone.
- Scroll down and tap on “Notifications” or “Notification Center”.
- Tap on an app to customize its notification settings.
- Adjust the notification style, choose the alerting method (banner, alert, or none), and enable or disable specific notification options based on your preference.
- You can also enable “Do Not Disturb” mode or schedule it to automatically activate during specific hours to minimize interruptions.
By customizing your notification settings, you can ensure that you receive the necessary alerts without being overwhelmed by unnecessary distractions.
Finding Equivalent Apps
Discovering Apple’s Native Apps
When switching from Android to iPhone, you may be accustomed to using certain apps that may not have direct equivalents on iOS. However, Apple provides a range of native apps that can serve as alternatives and provide similar functionalities.
Here are some native Apple apps that can replace popular Android apps:
- Safari (Web browser)
- Apple Maps (Navigation and Maps)
- Apple Music (Music streaming)
- Apple Podcasts (Podcasts)
- Mail (Email client)
- Pages (Document editing)
- Numbers (Spreadsheet editing)
- Keynote (Presentation creation)
Explore the native Apple apps available on your iPhone to discover alternatives that can replace your favorite Android apps.
Exploring Third-Party Alternatives
In addition to Apple’s native apps, the App Store offers a wide range of third-party apps that can serve as alternatives to the Android apps you are familiar with. These apps are developed by different companies and cater to various needs and preferences.
To discover third-party alternatives on the App Store, follow these steps:
- Open the App Store on your iPhone.
- Tap on the “Search” tab at the bottom of the screen.
- Enter the name of the Android app you want to find an alternative for, or enter a relevant keyword.
- Browse the search results and read the app descriptions and reviews to find suitable alternatives.
By exploring third-party alternatives, you can find apps that offer similar functionalities and provide a seamless transition from your Android apps to iOS.
Adjusting to iOS Settings
Configuring Wi-Fi and Bluetooth Settings
Configuring Wi-Fi and Bluetooth settings on your iPhone is essential for connecting to networks, accessories, and other devices. To configure these settings, follow these steps:
Wi-Fi Settings:
- Go to the “Settings” app on your iPhone.
- Tap on “Wi-Fi”.
- Toggle the switch to enable Wi-Fi.
- Select a Wi-Fi network from the available list, and enter the password if prompted.
Bluetooth Settings:
- Go to the “Settings” app on your iPhone.
- Tap on “Bluetooth”.
- Toggle the switch to enable Bluetooth.
- Your iPhone will automatically search for nearby Bluetooth devices. Tap on a device to pair it with your iPhone.
Ensure that Wi-Fi and Bluetooth settings are enabled and properly configured to enjoy seamless connectivity on your iPhone.
Managing Data Usage and Battery Life
Managing data usage and battery life are crucial aspects of using any smartphone, including an iPhone. By optimizing these settings, you can prolong your battery life and control data usage.
To manage data usage and battery life on your iPhone, follow these steps:
Data Usage:
- Go to the “Settings” app on your iPhone.
- Tap on “Cellular” or “Mobile Data”.
- Scroll down to see your apps and their respective data usage.
- You can toggle the switch next to each app to enable or disable its cellular data usage.
Battery Life:
- Go to the “Settings” app on your iPhone.
- Tap on “Battery”.
- Here, you can view the battery usage breakdown for different apps and services.
- Enable “Low Power Mode” to reduce power consumption and extend battery life when your battery is running low.
Managing data usage and enabling power-saving features such as Low Power Mode can help conserve battery life and prevent unnecessary data usage charges.
Setting Up Do Not Disturb
Do Not Disturb is a useful feature on your iPhone that allows you to silence calls, alerts, and notifications during specific periods. This feature is especially handy when you want uninterrupted sleep or concentrated work time.
To set up Do Not Disturb on your iPhone, follow these steps:
- Go to the “Settings” app on your iPhone.
- Tap on “Do Not Disturb”.
- Toggle the switch to enable Do Not Disturb.
- Customize the settings to your preference, such as allowing calls from specific contacts or enabling the “Bedtime Mode” to dim the lock screen and hide notifications during designated sleep hours.
By setting up and customizing Do Not Disturb, you can enjoy uninterrupted periods of focus, relaxation, or sleep without being disturbed by notifications or phone calls.
Syncing and Backing Up Data
Using iCloud for Backup and Sync
iCloud is Apple’s cloud storage and synchronization service that allows you to back up, sync, and access your data across multiple Apple devices. By using iCloud, you can ensure that your important data is securely stored and easily accessible.
To set up iCloud on your iPhone, follow these steps:
- Go to the “Settings” app on your iPhone.
- Tap on your name or Apple ID at the top of the menu.
- Tap on “iCloud”.
- Enable the toggle switches for the data you want to back up and sync, such as photos, contacts, calendars, and app data.
- Tap on “iCloud Backup” to automatically back up your iPhone data to iCloud.
By configuring iCloud settings and enabling automatic backups, you can ensure that your iPhone data is safely stored in the cloud and easily restored if needed.
Syncing and Managing Photos and Videos
Managing and syncing your photos and videos on your iPhone is essential for organizing and accessing your media files across devices. iCloud provides seamless photo and video syncing across Apple devices, making it easy to access your memories.
To sync and manage photos and videos on your iPhone, follow these steps:
- Go to the “Settings” app on your iPhone.
- Tap on your name or Apple ID at the top of the menu.
- Tap on “iCloud”.
- Enable the toggle switch for “Photos”.
- Choose whether you want to use iCloud Photo Library, which stores all your photos and videos in iCloud, or Optimize iPhone Storage, which keeps smaller versions of photos on your device to save storage space.
- You can also enable the “Upload to My Photo Stream” option to automatically upload new photos and make them accessible on your other Apple devices.
By syncing and managing your photos and videos using iCloud, you can easily access and share your media files across all your Apple devices.
Troubleshooting and Support
Troubleshooting Common Issues
While iPhones are known for their smooth performance and reliability, you may occasionally encounter common issues that can be resolved with simple troubleshooting steps. Here are some common issues and their possible solutions:
1. App Freezing or Crashing:
- Close the app and reopen it.
- Restart your iPhone.
- Update the app to the latest version.
- Delete and reinstall the app.
2. Battery Draining Quickly:
- Check for battery-intensive apps and limit their usage.
- Enable Low Power Mode.
- Turn off unnecessary features like Background App Refresh or Location Services.
3. Wi-Fi or Bluetooth Connectivity Issues:
- Restart your iPhone and the respective accessory.
- Forget the Wi-Fi or Bluetooth network and reconnect.
- Reset network settings on your iPhone.
4. Unresponsive Touchscreen:
- Clean the screen and remove any debris or fingerprints.
- Restart your iPhone.
- Update your iPhone to the latest iOS version.
- Reset all settings on your iPhone.
If common troubleshooting steps don’t resolve the issue, it is advisable to reach out to Apple Support for further assistance.
Utilizing Apple Support Resources
Apple offers a wide range of support resources that can help you with any questions or issues you may encounter when using your iPhone. Here are some helpful support resources:
- Apple Support Website: Visit the official Apple Support website to search for articles, user guides, and troubleshooting solutions.
- Apple Support App: Install the Apple Support app on your iPhone to access helpful tips, chat with Apple experts, and schedule support appointments.
- Genius Bar Appointments: Book an appointment at an Apple Store and get in-person support from Apple experts at the Genius Bar.
- Community Forums: Engage with fellow Apple users and experts on Apple’s Community Forums to seek advice, share experiences, and find solutions.
By utilizing these support resources, you can ensure that any issues or questions you have about your iPhone are addressed promptly and effectively.
In conclusion, switching from Android to iPhone may initially seem overwhelming, but with proper preparation and understanding of the features and settings, the transition can be seamless. By following the steps outlined in this guide, you can transfer your data, customize your iPhone, explore iOS features, and troubleshoot any common issues that may arise. Embrace the new features and benefits of your iPhone and enjoy the unique iOS user experience!